 ChatGPT
 Claude
 Gemini
 Perplexity
Workflow Step 1 — Assign Assessment
Create an assessment instance by selecting an account and assessment template from your Library. When you create the assessment, it is automatically assigned to that account.
Opening the Create Assessment Form
Click Assign Assessment in the sidebar under Create menu, or navigate to Assessments → Create Assessment.
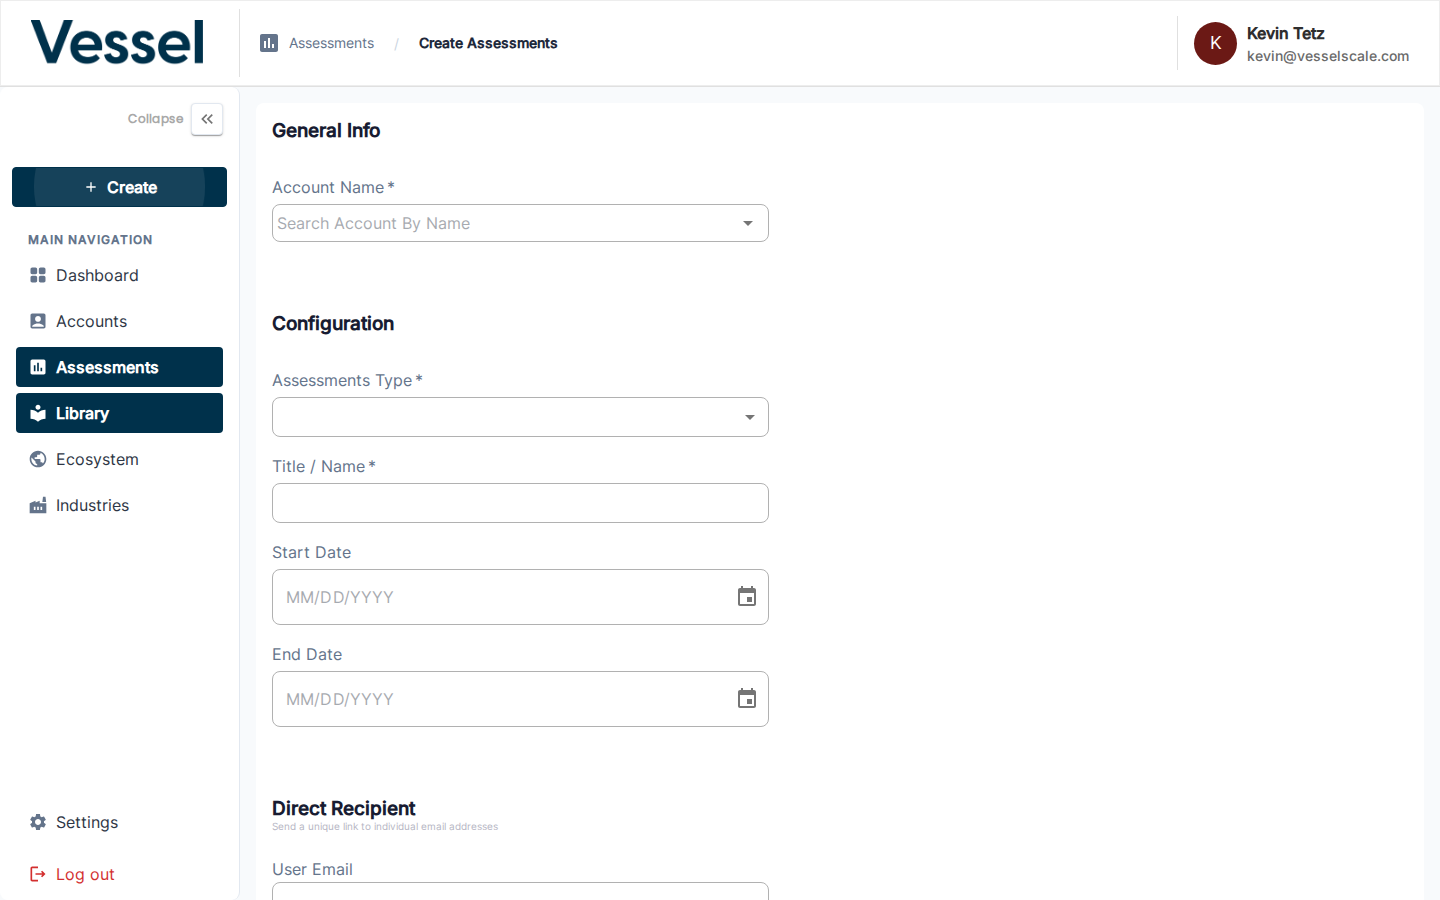
Form Fields
| Field | Description |
|---|---|
| Account Name | Search and select the account being assessed |
| Assessment Type | Choose the Library template to use for this assessment |
| Title / Name | A descriptive name for this assessment instance |
| Start Date | When the assessment opens for responses |
| End Date | When the assessment closes |
| Direct Recipient | Optional — a specific respondent's email address |
Click Save to create the assessment. You will be taken to the assessment detail page.
What Happens After Assignment
Once created, your assessment:
✅ Is assigned to the account — The account name is now linked to this assessment
✅ Enters Draft status — Assessment is ready for final edits before publishing
✅ Has a unique URL — Ready to be shared once published
✅ Shows in the Assessment list — Appears under Assessments in your sidebar
Next Step
Workflow Step 2 — Publish Assessment
Related
- Create Assessment Reference — Detailed form fields and options
- Assessment Details — View and manage your assessment
- Assessments Overview — Assessment management guide