 Claude
 Perplexity
Step 3 — Deliver your Assessment
Create assessment instances from your Library template and share them with respondents to collect their feedback.
Part 1 — Create an Assessment Instance
Opening the Create Assessment Form
Click + Create → New Assessment in the sidebar, or navigate to Assessments → Create Assessment.
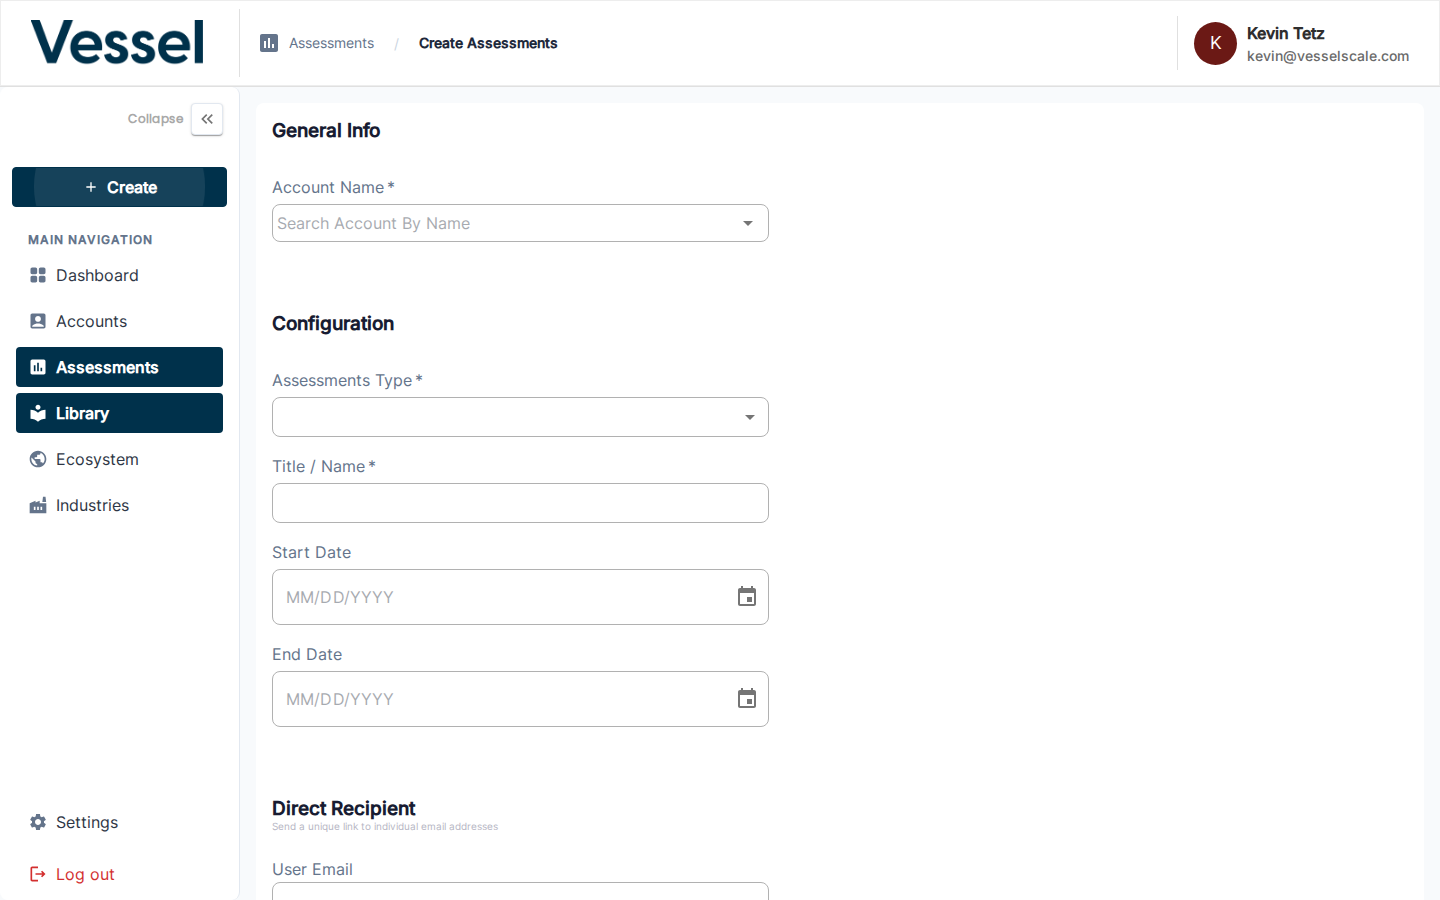
Form Fields
| Field | Description |
|---|---|
| Account Name | Search and select the account being assessed (required) |
| Assessment Type | Choose the Library template to use (required) |
| Title / Name | A descriptive name for this assessment instance |
| Start Date | When the assessment opens for responses |
| End Date | When the assessment closes |
| Direct Recipient | Optional — a specific respondent's email address to receive a direct link |
Saving the Assessment
Click Save to create the assessment. You will be taken to the assessment detail page.
Learn more: Create Assessment Reference
Part 2 — Share the Assessment with Respondents
Once the assessment is created, you need to share it so respondents can submit their answers.
Step 1 — Publish the Assessment
The assessment must be set to Published status before respondents can submit responses. On the assessment detail page, change the status from the status dropdown in the header area.
Draft vs. Published
Keep assessments in Draft status while you're setting them up. Move to Published once you're ready to share with respondents.
Step 2 — Share the Assessment
On the Assessment Details page, scroll down to the Share Assessments Link card.
There are three ways to deliver the assessment:
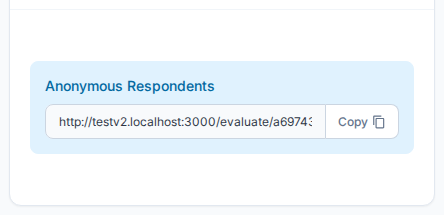
Option A — Anonymous Respondents
Copy the Assessment Link and share it however you like — email, chat, or your own portal. Anyone with the link can submit a response once the assessment is published.
Best for: Open surveys, public feedback, or when you don't need to track specific respondents.
Option B — Direct Recipients
Click + Add to send a unique, one-time link to a specific email address. Direct links are tied to that recipient and cannot be reused.
Best for: Targeted assessments, ensuring specific individuals respond, or tracking who responded.
Option C — Intake Form
Use the Intake Form to deliver assessments alongside account creation. When a client submits an intake form, they can immediately launch an assessment as part of the same workflow.
Best for: New client onboarding, combining account setup with initial assessment.
Learn more: Intake Forms
Tracking Responses
The assessment detail page shows Total, Closed, and In Progress counts so you can monitor participation in real time.
Key information displayed: - Response status — How many respondents have submitted vs. are still working - Submission dates — When responses were received - Response completeness — Which respondents completed the assessment
Next Step
Related
- Assessment Details Reference — Full assessment management
- Assessment Details Page — View and manage assessment
- Create Assessment Reference — Form fields and options
- Share Assessments — Respondent management and sharing options
- Intake Forms — Self-service account and assessment delivery
- Assessment Status & Workflow — Understanding assessment states